
Quests
A Glimpse Of Eternity
A Glimpse Of Eternity is a quest in Enshrouded, given to you by the Alchemist.
Quest Prerequisites
Complete

Place down the Mill
Flame Altar Level 8
Quest Objectives
Reward: Eternal Fireball II

, 75 XP
Objective # | Objective Title | Location | Description |
|---|---|---|---|
1 | Uncover The Secrets Of The Hidden Tomb |  | The alchemist told you about a mad wizard obsessed with creating a spell for eternal life. He allegedly conducted his experiments deep underground, where no one could see what he was truly doing. It's uncertain if he ever achieved the spell he sought — but he did create something. Go to the hidden tomb where he is said to have worked, and search for any traces of him. |
2 | Locate and Explore the Next Tomb | - | You have found a record of the experiments the mad wizard conducted. Sadly, his work in this tomb was unsuccessful, but he cryptically noted where his next experiment would take place: "From the water, I cross Gateway Outpost "Darkwater" and venture into the jungle to seek the next tomb." |
3 | Locate and Explore the Next Tomb | - | The wizard was indeed experimenting in this tomb, and you have also discovered one of his results: an eternal fireball. Yet he was unsatisfied with his creation and declared he would continue his journey to a hidden tomb behind the great tower in the lake, close to Goldrock Saddle. |
4 | Locate and Explore the Next Tomb | - | With this creation, the wizard came very close to his goal. Unfortunately, he had created a heal beam channel — one that grants life to others, not himself. In his egocentric mind, this was a disaster. He mentioned that the next tomb isn't far. He heard its more like a maze, and some race through it as a challenge. He is delighted at the thought, that many apprentices will be there. |
5 | Locate and Explore the Next Tomb | - | The creature that seized the spell gave the wizard quite a fight. He had to hunt it down until they emerged on the other side of the tomb. Who would have thought this tomb was a tunnel? Yet again, he ended up creating a lightning spell — and still no eternal life spell. He already feels defeated, believing there is only one tomb left where he can attempt his experiments unnoticed. It's near Stillwater Bay towards the foot of the hills. |
6 | Return To The Alchemist | - | The wizard's final experiment resulted in an eternal ice bolt spell. He believed he could use it to freeze himself and, in doing so, achieve eternal life — in a way. |
Walkthrough
Objective 1
Head to the
Hidden Tomb location listed for the quest.
In the caves you will notice a ruin with short pillars. Inside the ruin use a pickaxe or explosives to clear the rubble down to allow entry to the tomb.
Descend the tomb until the path splits north and south into water areas. The north path leads to a narrow water corridor, you can take this path avoiding saw traps to get a couple of chests. Then continue down to the south water area. There is a chest under the initial platform but be sure to watch for the spinning saw blades here as well.
Swim through the opening to the south and come up on the other side. Follow the rooms until you get to the lectern with the lore book

Experiments Of Eternity. Reading it will complete the first objective.
Finish exploring and leave the tomb.
Objective 2
Head to the ruin, it is an unmarked location on the map. The entrance is located at coordinates x:5584 y:4760 just south of the lore note
Dig down on the inside of the ruin on the west to gain entry. Descend into the tomb until you get to the lectern with the lore page
Read the page and then you will have to traverse the water on the north side of the room. The swim is long but 30 seconds of breath is enough with sprint swimming. It is also recommended to have some underwater light source such as Wisp of Light
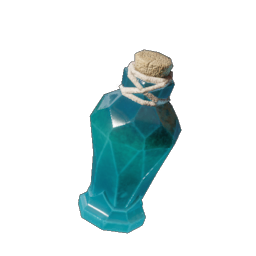
.
Dive into the water head through the passage all the way north.
Turn right and head all the way down east.
Turn right again and head south until you see an opening for a room on the left, head into the room and swim up to break for air.
Head back out into the water west and turn left before the open sarcophagus and head south all the way down.
Turn to the right and head into the green glow room, the sarcophagus at the bottom of the room contains the Eternal Fireball II
spell. Then quickly return back to the room for air. Getting the spell completes objective two.
Retrace steps out of the water and back to the lore note. Finish exploring and leave the tomb.
Objective 3
Head to the next ruin the entrance is located an unmarked location with coordinates: x:5040 y:5905. It is located just north west of the lore note
The Spell That Betrayed Me. It is nestled in a wide opening under the rock.
No need to dig this time just head in and traverse down the tomb. This tomb is long and has several floors and enemies.
At the end of the tomb one of the rooms will have a lectern with the lore book
The Spell That Betrayed Me immediately to the right, and the room will be filled with water. Read the note jump in the water to grab the Eternal Heal Beam Channel

spell. Gaining the spell will complete objective three.
Finish exploring and exit the tomb.
Objective 4
Head to the next ruin the entrance is located at an unmarked location with the coordinates: x:3780 y:6520 directly to the south of

You can descend the tomb, however without any upgraded breath time you will not be able to cross to the other side easily.
Instead it is easier to simply fly to the other end. Start by traveling to the

Ancient Spire - Blackmire and fly to the

Flame Shine then from here fly over to the other tomb entrance located at another unmarked location with coordinates x:3683 y:6378, it is located right next to the lore note
At this point you actually do not have to go into the tomb at all, simply walk over to the nearby grave south east of the tomb entrance and read the note. Dig into the grave to find a gold chest with the Eternal Lightning Channel
spell. This completes objective four.
Explore the tomb if you wish.
Objective 5
Head to the next ruin the entrance is located at an unmarked location with the coordinates: x:3208 y:7287 next to the lore note
Head into the tomb there will be a lot of Hollow at the start. Clear out the enemies and locate the room with the lectern with the lore book
Read the book and then you will have to traverse underwater. You'll need about 50 seconds of breath to make it there and back otherwise with 30 seconds you can make it to the sarcophagus and die then return for your loot. The sarcophagus will contain the Eternal Ice Bolt II

spell, gaining the spell will complete objective 5.
Finish exploring the tomb if you wish, leave when finished.
Objective 6
Simply return to the Alchemist and speak with him to complete the quest.
Sources
Game information adapted from Enshrouded Wiki contributors. Text is available under CC BY-SA 4.0; individual media may have separate terms. Presentation and connections are arranged by MyGamesWiki.
- Quests/A Glimpse Of Eternity · Revision 51462 · checked 2026-10-23